In this article we will see how to get data to PowerBI Desktop.
Open the PowerBI Desktop application, In the Home Menu we can see the Getdata option as displayed below.
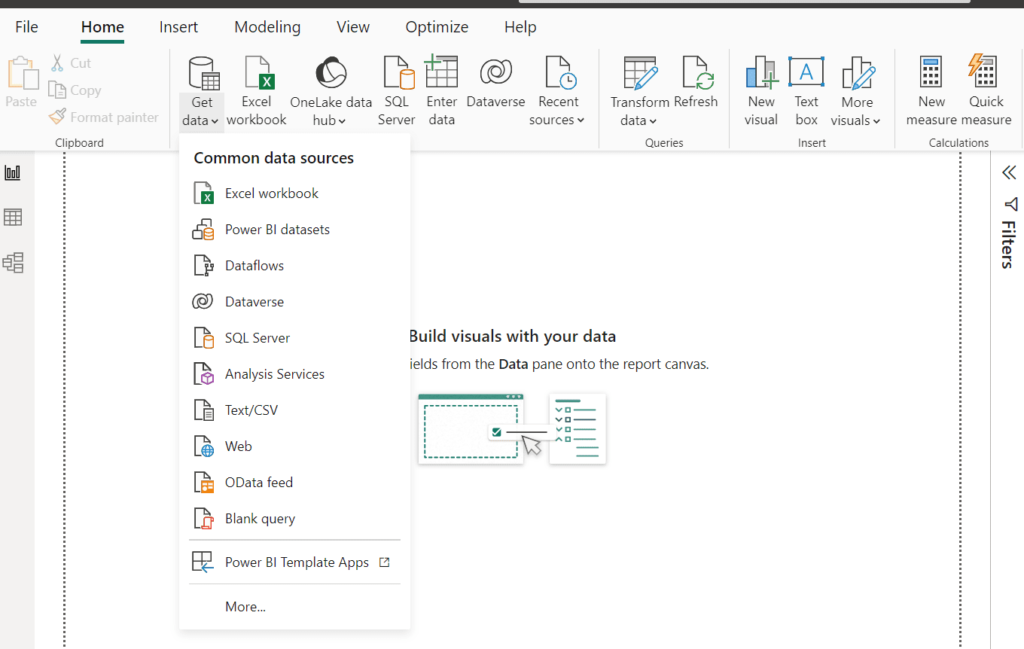
Under Getdata option, We can see common data sources like Excel workbooks, SQL Server, Text/CSV or web etc..
In this example we will see how to get data from a Text/CSV file.
Click on the Text/CSV option, you can get a window to browse the file. I am browsing the orders_dataset.csv available in Brazillian Ecommerce dataset. You can download the data using the below link.
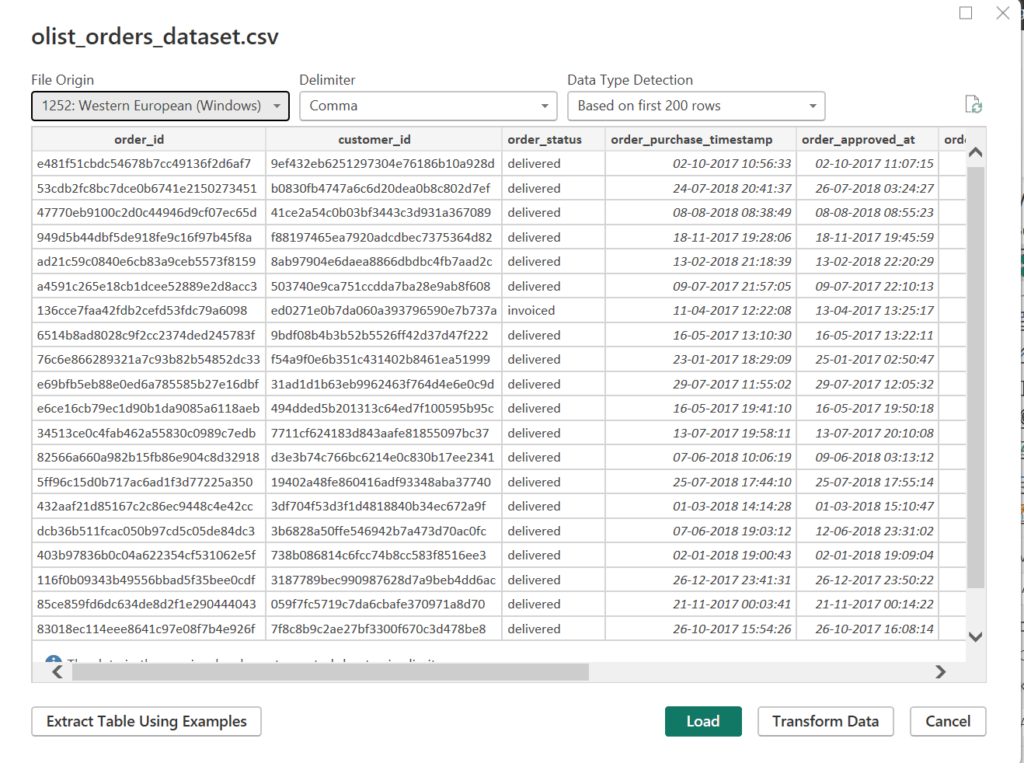
Once you browse the file, you will see buttons like Load, Transform Data and Cancel.
We will get into the details of these.
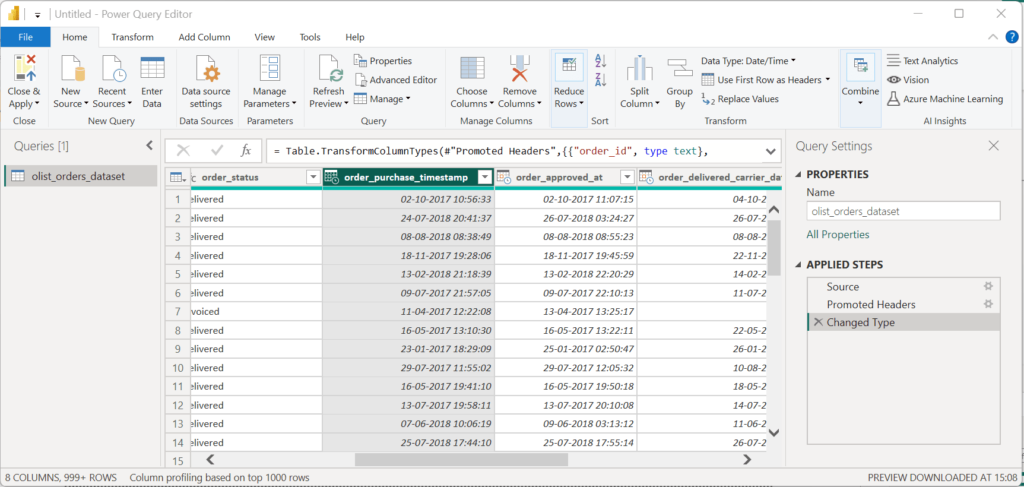
Transform Data: Transform Data button is to transform the data available in the data source file. If we click the Transform Data button, we will get the below PowerQueryEditor screen where we can see so many menu options to modify or transform the available data.
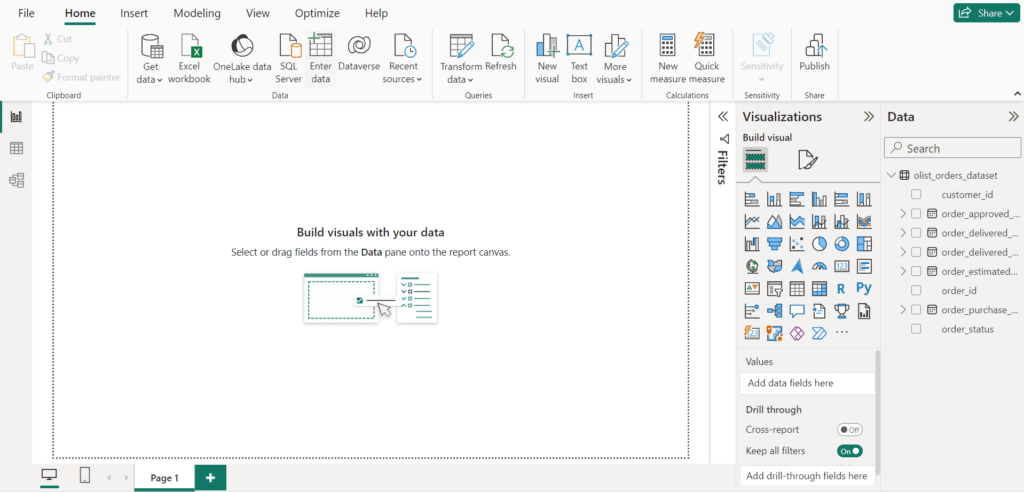
Load: If you click on Load button, your data will be loaded and you can see the ReportView like the below screen.
ReportView: Where you can build visuals like charts or maps with your data to analyse.
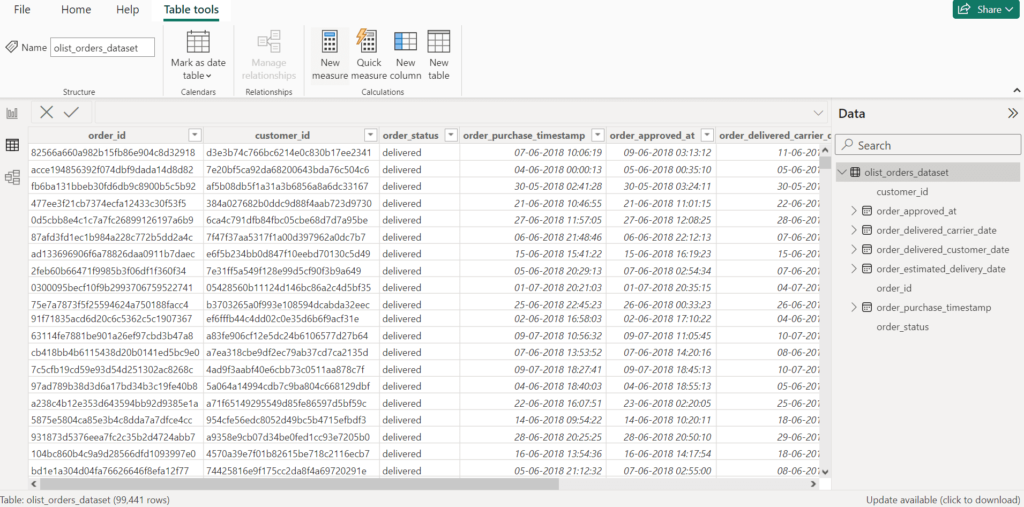
TableView: The tabular representation of your data from data source.
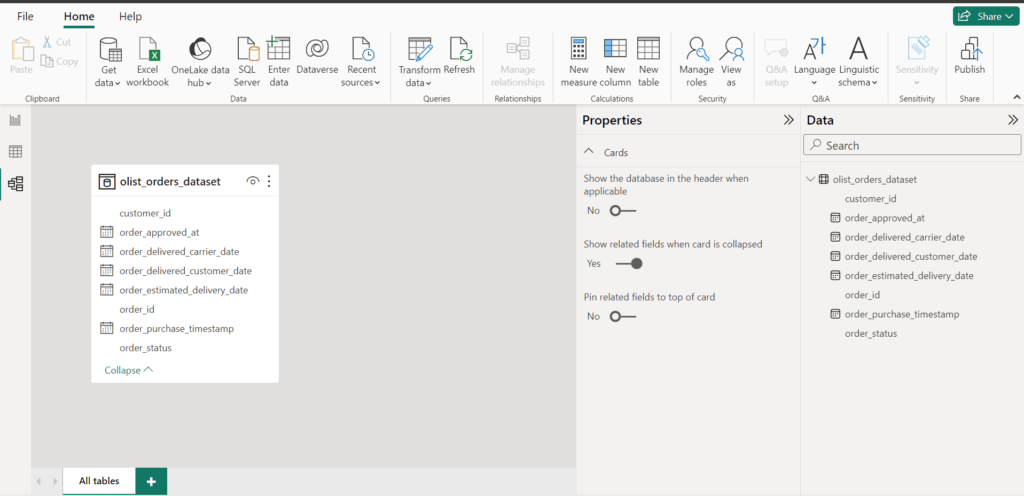
Model View: Represents the data model of your data source. Currently we considered data from a single file, so the data model looks like the below.
Following this approach you can get data to PowerBI Desktop from any data source to build visuals.
Note: If we have data from different data sets, the data model view will be different as per the joins between the tables. We will see in another blog , how a data model looks like if the data is from different data sets.


